
So, you’re thinking about getting solar panels installed on your roof? That’s a great idea! Solar panels can help you save money on your energy bills and reduce your carbon footprint. But you might be wondering, how exactly are solar panels installed? Well, you’ve come to the right place. In this blog post, we’ll break down the process of installing solar panels in simple terms, so you know exactly what to expect.
Step 1: Consultation
The first step in the solar panel installation process is to have a consultation with a solar energy company. During this consultation, a solar expert will assess your roof and determine if it’s suitable for solar panel installation. They’ll take into account factors like the size of your roof, its orientation to the sun, and any shading from nearby trees or buildings. At Orchid Energy, we offer free consultations, so feel free to reach out to us if you’re curious!
Step 2: Designing Your Solar System
Once your roof has been assessed and deemed suitable for solar panels, the next step is to design your solar system. The solar company will create a customised design based on your energy needs, roof size, budget, and other factors. They’ll determine how many solar panels you need, where they should be placed on your roof, and how they’ll be connected to your home’s electrical system.
Step 3: Obtaining Permits and Approvals
Before any work can begin, the solar company may need to obtain permits and approvals from your local government and utility company. This process can vary depending on where you live, but don’t worry – the solar company will take care of all the paperwork for you.
Step 4: Installation
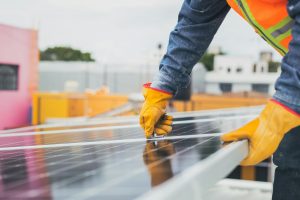
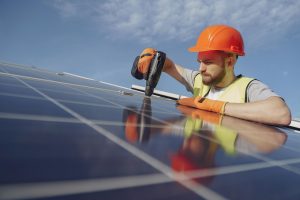
Once all the necessary permits and approvals have been obtained, it’s time for installation! A team of solar technicians will arrive at your home with all the equipment and materials needed to install your solar panels. They’ll start by attaching mounting hardware to your roof, then carefully place each solar panel in its designated spot.
Step 5: Wiring and Connection
After the solar panels have been securely mounted to your roof, the next step is to connect them to your home’s electrical system. This involves running wiring from the solar panels to an inverter, which converts the DC electricity generated by the panels into AC electricity that can be used to power your home. The inverter is then connected to your home’s electrical panel, allowing you to start using solar energy right away.
Step 6: Final Inspection and Activation
Once the installation is complete, a final inspection will be conducted to ensure that everything has been installed correctly and meets building codes and safety standards. Once the inspection is passed, your solar panels will be activated, and you can start enjoying the benefits of clean, renewable solar energy!
Installing solar panels on your roof is a straightforward process that can be completed in just a few simple steps. From the initial consultation to the final inspection, Orchid Energy will guide you through every stage of the installation process, ensuring that your solar panels are installed correctly and ready to start saving you money on your energy bills! So why wait? Take the first step towards a brighter, greener future and schedule your solar panel consultation today!